





Übersicht
Wallet vorbereiten
- Unzip PirateCash Core file to the location of your choice. You will run the wallet from this location.
-
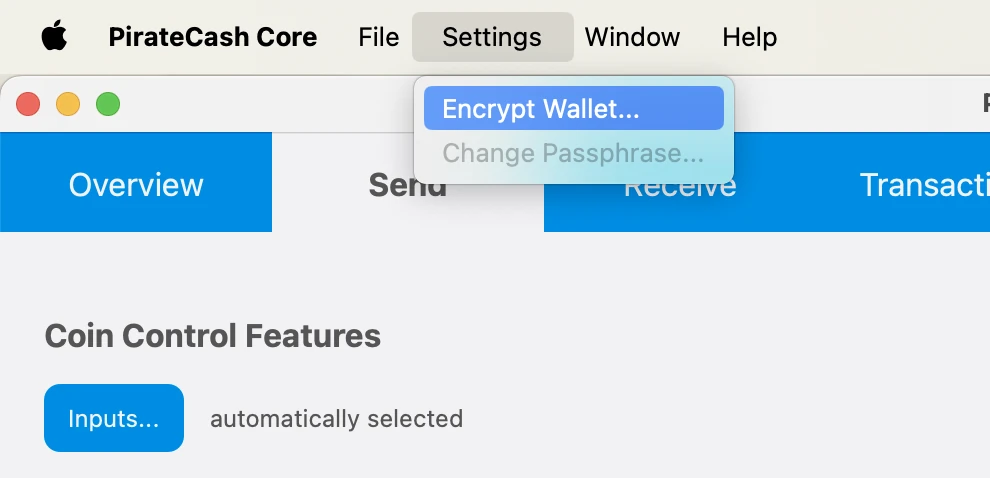
Encrypt your wallet: Settings -> Encrypt Wallet. Choose a password. Write it down. Restart your wallet.
- Backup Wallet: File -> Backup Wallet
-
Click Window -> Console to open the console. Type the following command into the console to generate a new PirateCash address for the collateral:
getnewaddress MN1 getnewaddress MN1 -
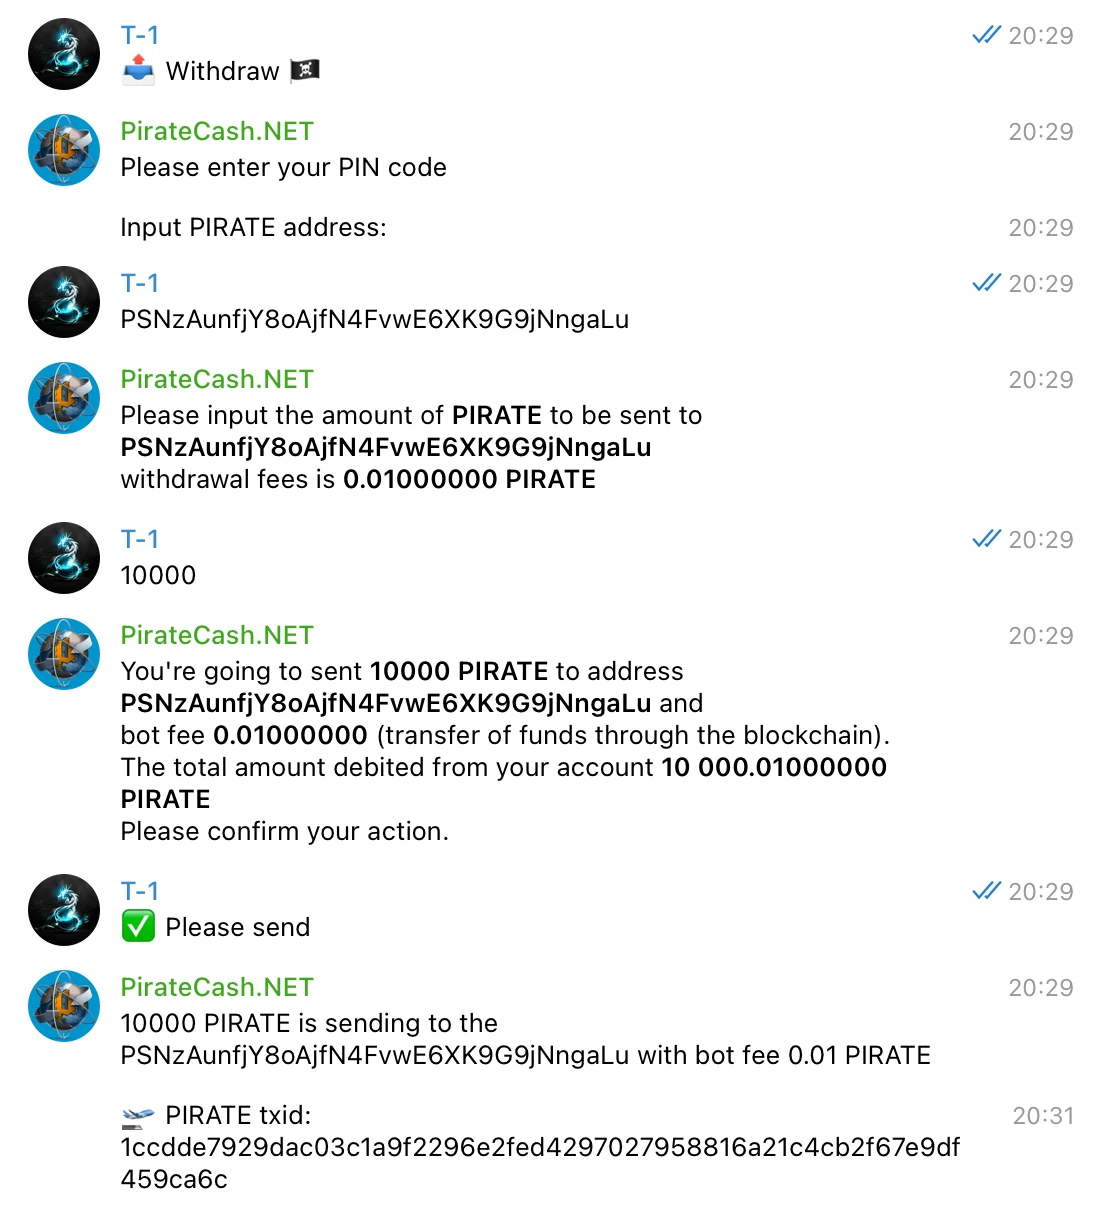
To send 10,000 PIRATE to this address via @piratecash_bot, you need to go to the 💵 Balance → PirateCash → 📤 Withdraw️ menu or execute the command /withdraw_pirate.
Create a Linux droplet on DigitalOcean
- Register for an account, create new “droplet” – Digital Ocean’s term
- Ubuntu 26.04 (LTS) auswählen
- Select 2 GB/1vCPU – sufficient and only $12/month
- Select any datacenter region you like. Create!
- Write down your droplet IP address
- Check your email for initial VPS root password
-
Access VPS via PuTTY – this will allow you to copy and paste commands to your VPS. The web console will not. Mac users can use Terminal. Launchpad -> Search -> Terminal -> Type: ssh root@IP
ssh root@SERVER_IP -
P2P: 63636/tcp
ufw allow 63636/tcp ufw enable -
Create a Swap File:
fallocate -l 1G /swapfile
chmod 600 /swapfile
mkswap /swapfile
swapon /swapfile
echo "/swapfile none swap sw 0 0" >> /etc/fstab
Automatische Einrichtung aus dem masternode-Repository
Nach dem Erzeugen des BLS-Schlüssels ist der einfachste Weg zur Konfiguration der Node das Skript aus unserem masternode-Repository.
- Kaufen Sie 10.001 PIRATE, zum Beispiel auf PancakeSwap.
- Wenn Sie bereits Token haben, tauschen Sie diese über @piratecash_bot in native PIRATE-Coins.
- Starten Sie einen Server bei einem Hosting-Anbieter, zum Beispiel über diesen Hosting-Link.
- Greifen Sie per SSH auf den Server zu.
-
Klonen Sie das Repository: https://github.com/piratecash/masternode.
git clone https://github.com/piratecash/masternode.git cd masternode - Erzeugen Sie in PirateCash einen BLS-Schlüssel mit bls generate. Tragen Sie den Wert secret in masternodeblsprivkey=xxx in /home/pirate/.piratecore/piratecash.conf innerhalb von Docker oder in /opt/node/piratecash/piratecash.conf auf dem Host-System ein.
-
Führen Sie ./install_masternode.sh für die automatische Einrichtung aus.
./install_masternode.sh - Starten Sie Docker neu.
- Aktivieren Sie die Masternode über PirateCash Core und fahren Sie danach mit den Aktivierungsschritten unten fort.
Masternode configuration file setup
Zweite Option: manuelle Einrichtung. Diese Methode ist komplexer; verwenden Sie sie nur, wenn Sie das automatische Setup-Skript nicht nutzen möchten.
BLS
- Enter RPC console: Window –> Console
-
Type: bls generate
bls generate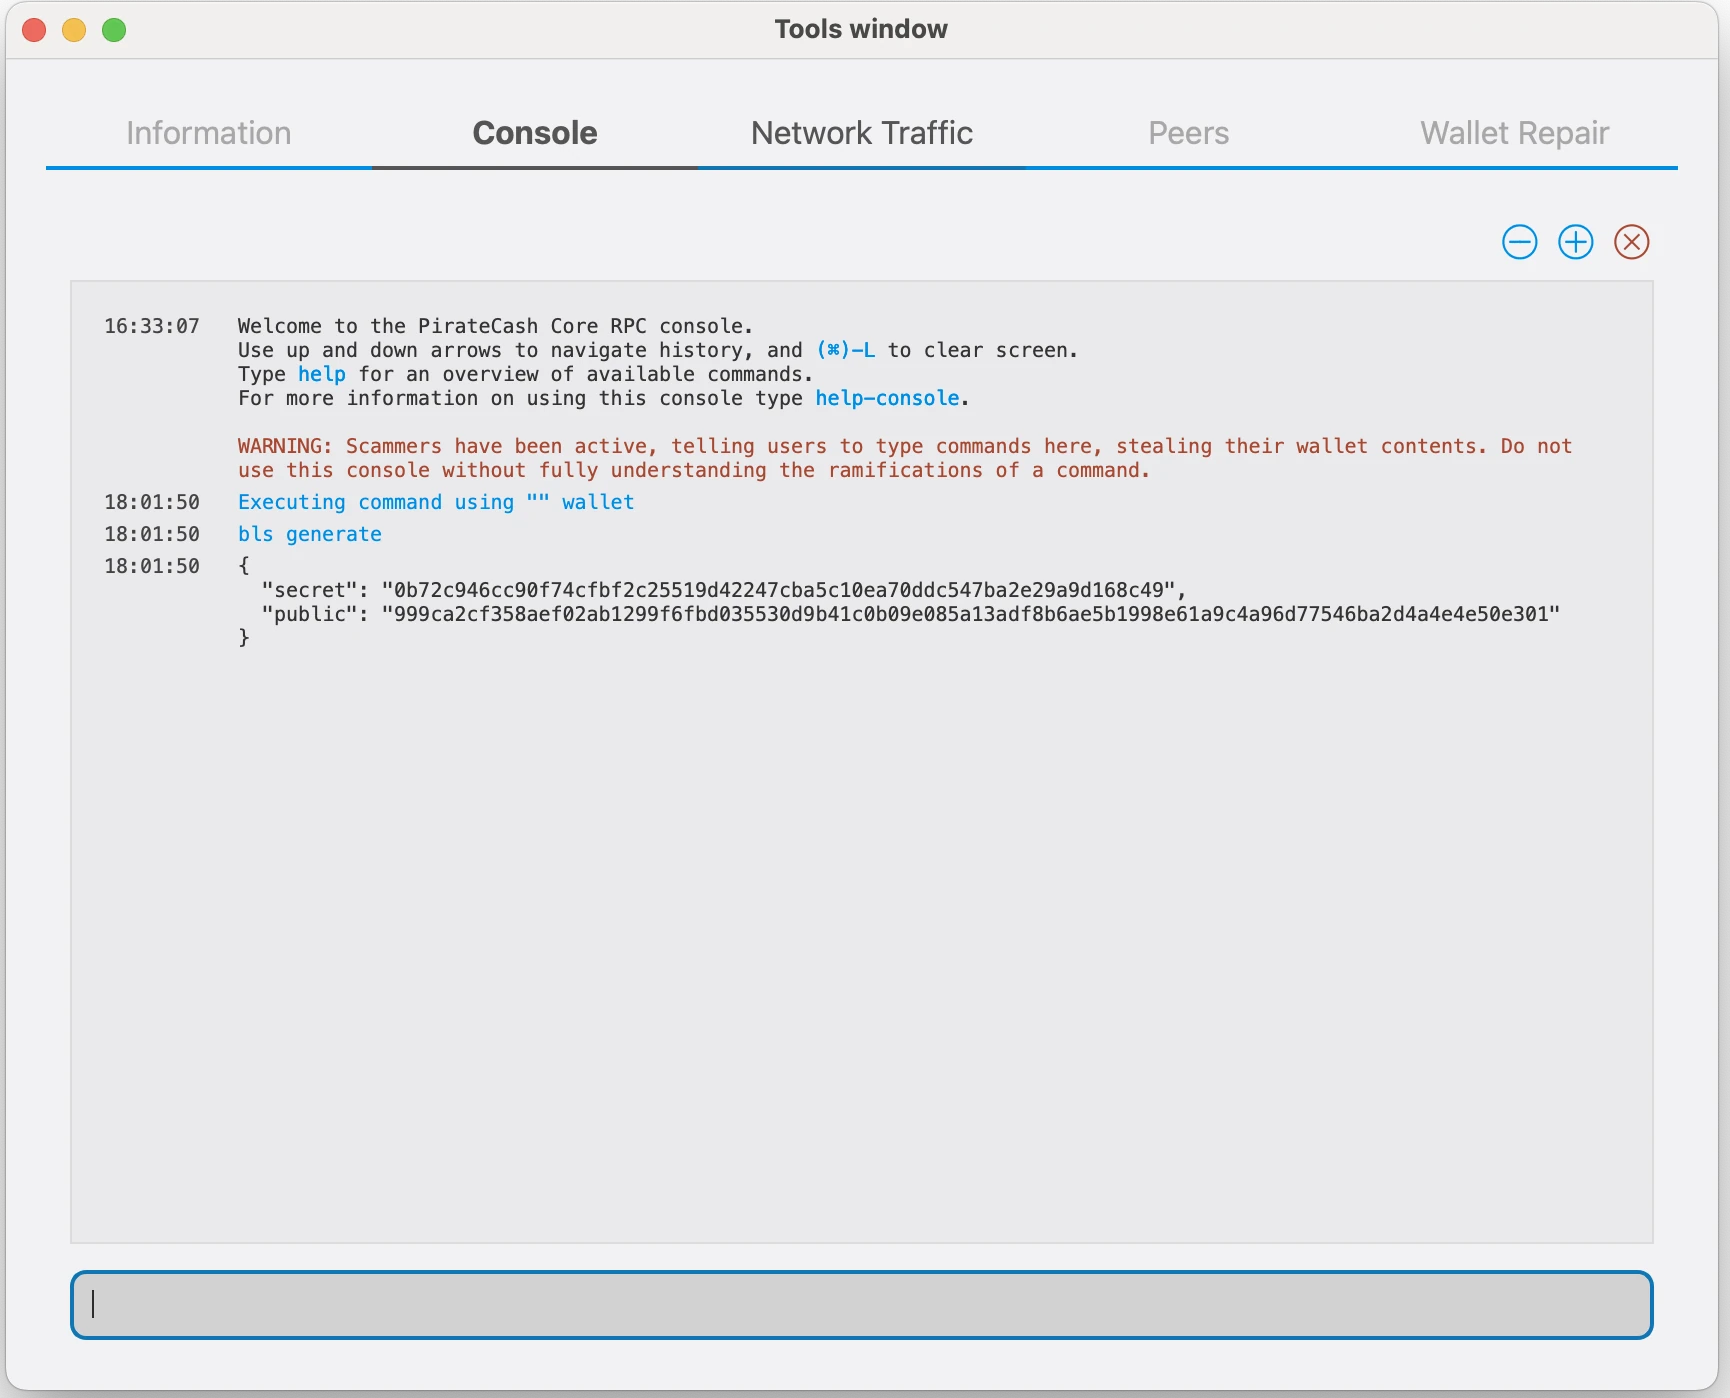
PirateCash Core
-
Goto to Droplet and please Download archive
wget https://github.com/piratecash/piratecash/releases/download/v23.1.8-pirate/piratecashcore-23.1.8-x86_64-linux-gnu.tar.gztar -xzf piratecashcore-23.1.8 -x86_64-linux-gnu.tar.gz -
Create directory mkdir ~/.piratecore
mkdir -p ~/.piratecore nano ~/.piratecore/piratecash.conf - Create file ~/.piratecore/piratecash.conf with following content:
rpcuser=RPC_USER
rpcpassword=RPC_PASSWORD
corsarpcuser=CORSA_RPC_USER
corsarpcpassword=CORSA_RPC_PASSWORD
corsarpcport=46464
rpcallowip=127.0.0.1
server=1
rest=1
listen=1
txindex=1
listenonion=0
daemon=1
maxconnections=700
masternodeblsprivkey=BLS_SECRET_KEY
externalip=SERVER_IP
Ersetzen Sie die mit XXXXXXX markierten Felder wie folgt:
rpcuser: Geben Sie eine beliebige Zeichenfolge aus Zahlen oder Buchstaben ein, Sonderzeichen sind nicht erlaubt
rpcpassword: Geben Sie eine beliebige Zeichenfolge aus Zahlen oder Buchstaben ein, Sonderzeichen sind nicht erlaubt
corsarpcuser: Geben Sie den RPC-Benutzernamen für den lokalen corsa-chat-Dienst ein
corsarpcpassword: Geben Sie das RPC-Passwort für den lokalen corsa-chat-Dienst ein
corsarpcport: Verwenden Sie den für corsa-chat konfigurierten RPC-Port; Standard ist 46464
externalip: Das ist die IP-Adresse Ihres VPS
Füllen Sie das Feld masternodeblsprivkey aus, indem Sie in der Konsole bls generate ausführen, und starten Sie den piratecashd-Daemon neu.
corsa-chat-Anforderung
corsa-chat-Anforderung für PirateCash Core v19
Ab PirateCash Core v19 muss eine Masternode zusätzlich eine lokale corsa-chat/Corsa-Node auf demselben Server ausführen. Die automatische Einrichtung im masternode-Repository konfiguriert PirateCash Core und corsa-chat zusammen. Die Anforderung ist in PIP-0001 beschrieben.
Laden Sie vor dem Start von PirateCash Core den Corsa-Daemon herunter und starten Sie ihn. Verwenden Sie dieselben RPC-Benutzer- und Passwortwerte wie corsarpcuser und corsarpcpassword in piratecash.conf:
wget https://github.com/piratecash/corsa/releases/download/v1.0.62/corsa-linux-amd64.tar.bz2tar -xjf corsa-linux-amd64.tar.bz2
nohup env \
CORSA_LISTEN_ADDRESS=:64646 \
CORSA_BOOTSTRAP_PEERS=65.108.204.190:64646 \
CORSA_RPC_HOST=127.0.0.1 \
CORSA_RPC_PORT=46464 \
CORSA_RPC_USERNAME=CORSA_RPC_USER \
CORSA_RPC_PASSWORD=CORSA_RPC_PASSWORD \
./corsa-node > corsa-node.log 2>&1 &
Nachdem Corsa läuft, starten Sie den PirateCash-Daemon.
./piratecashdSentinel
Die Sentinel-Einrichtung ist für neue Masternodes nicht mehr erforderlich. Die Sentinel-Unterstützung wird in PirateCash Core v20 deprecated, daher müssen Sie Sentinel und den Sentinel-Cronjob nicht installieren.
ProRegTx
-
After the transaction is completed, various keys related to the transaction need to be extracted for later inclusion in a configuration file and registration transaction. This registration transaction serves as proof, recording the configuration on the blockchain and ensuring the masternode’s inclusion in the deterministic list. Please execute masternode outputs
masternode outputs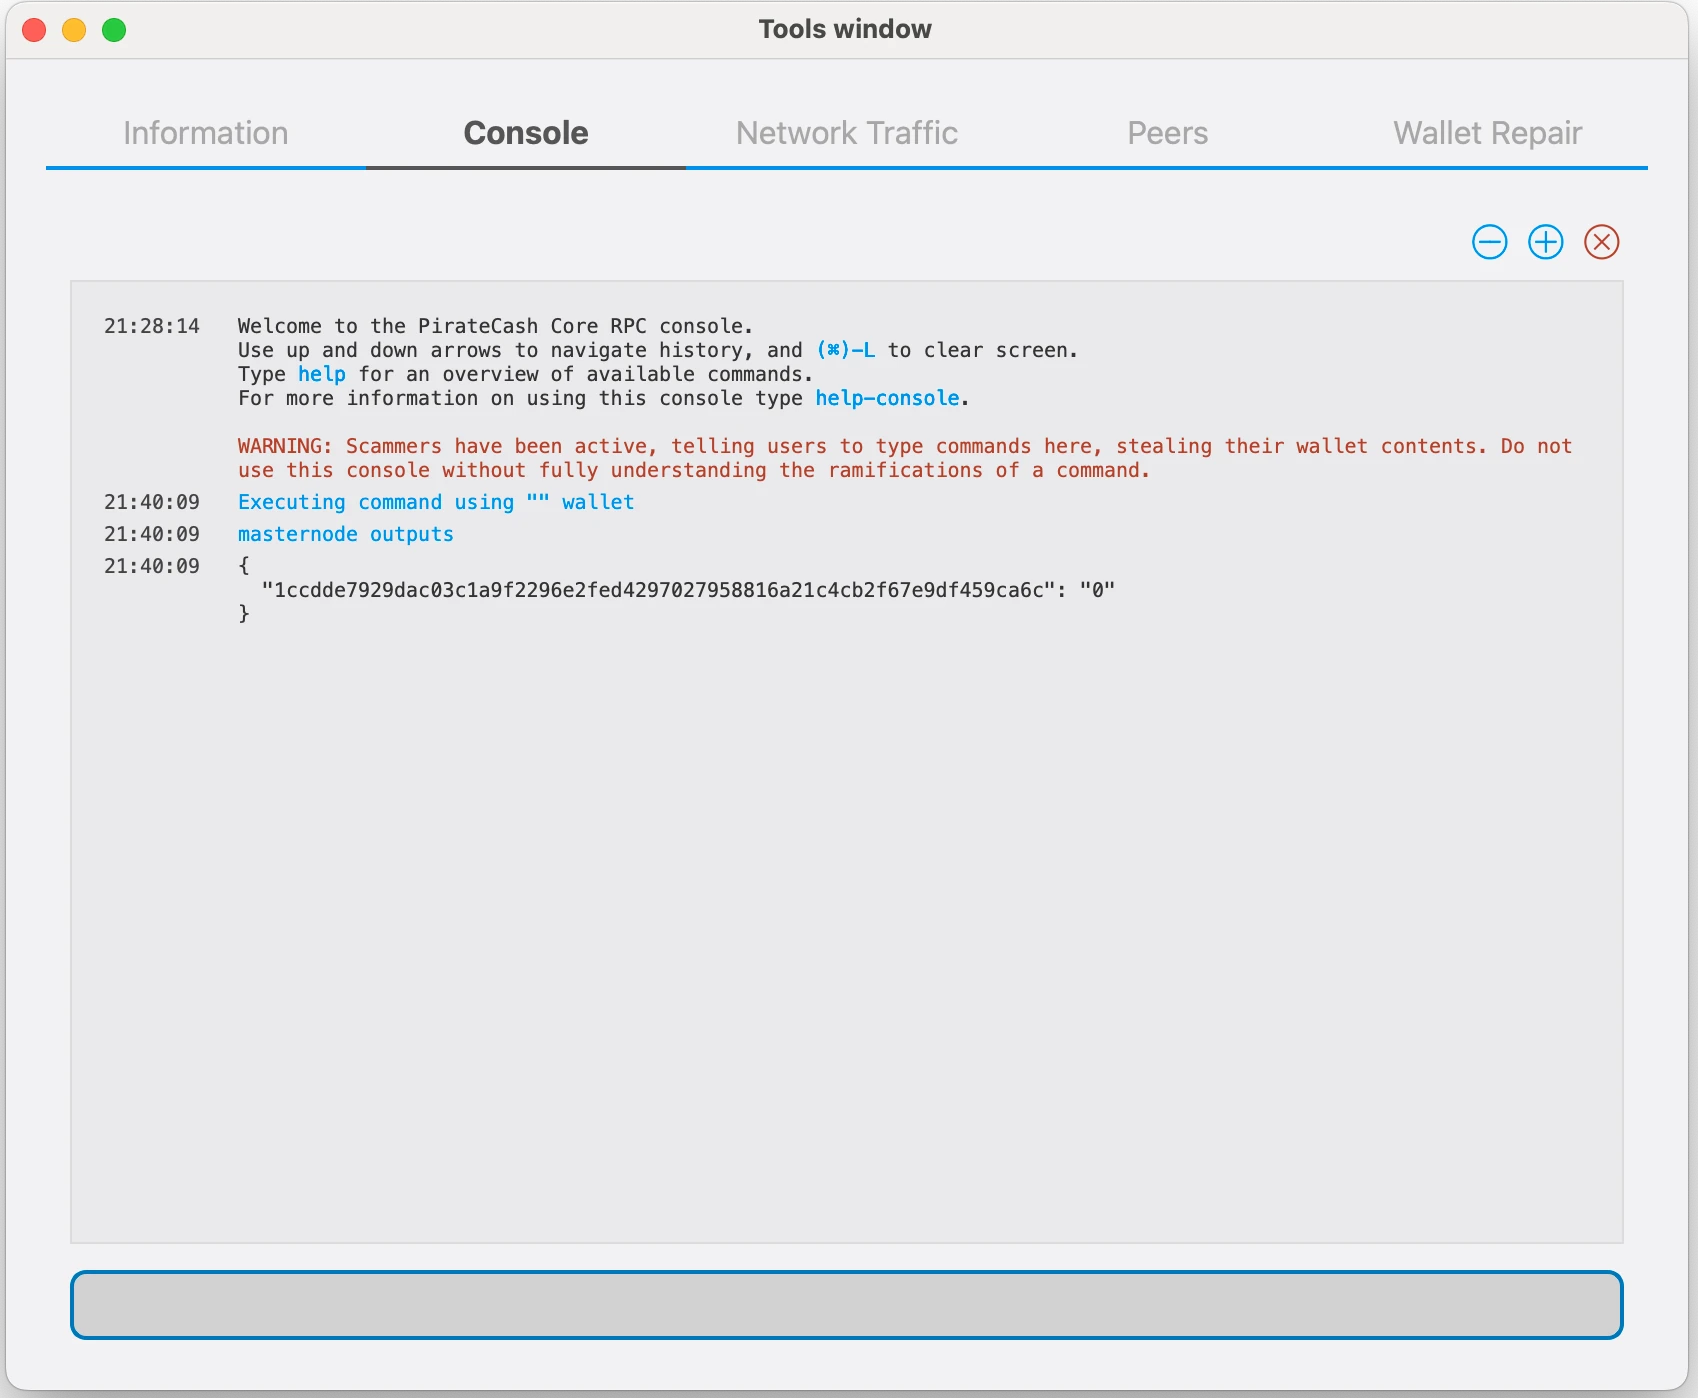
-
Prepare a ProRegTx transaction
First, we need to get a new, unused address from the wallet to serve as the owner key address (ownerKeyAddr). This is not the same as the collateral address holding 10,000 PIRATE. Generate a new address as follows:
getnewaddress owner_keygetnewaddress owner_key -
This address can also be used as the voting key address (votingKeyAddr). Alternatively, you can specify an address provided to you by your chosen voting delegate, or simply generate a new voting key address as follows:
getnewaddress voting_keygetnewaddress voting_key -
Then either generate or choose an existing address to receive the owner’s masternode payouts (payoutAddress). It is also possible to use an address external to the wallet:
getnewaddress masternode_payoutsgetnewaddress masternode_payouts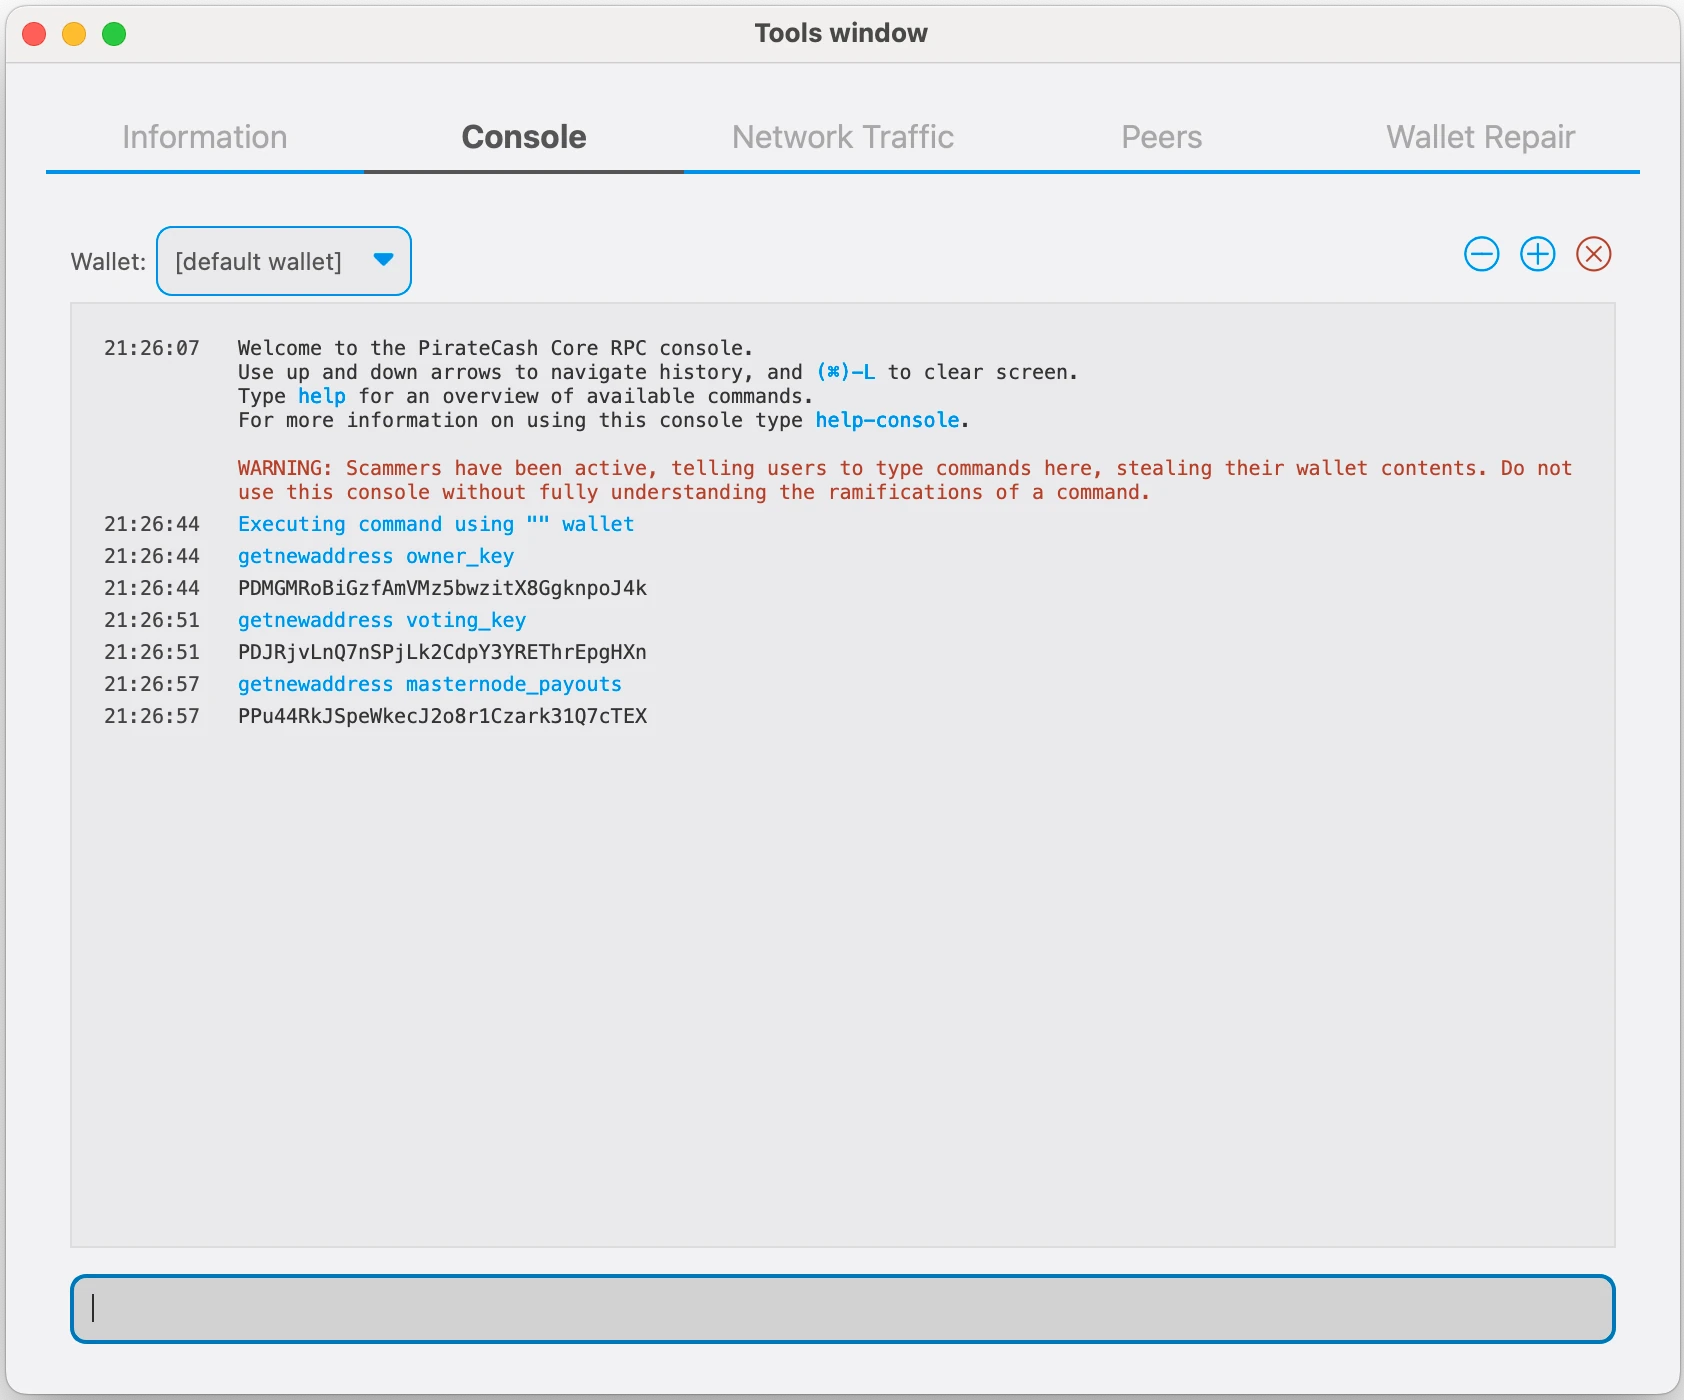
-
You can also you need to generate and fund another address as the transaction fee source(feeSourceAddress). If you selected an external payout address, you must specify a fee source address:
getnewaddress pay_feesgetnewaddress pay_fees -
We will now prepare an unsigned ProRegTx special transaction using the protxregister_prepare command. This command has the following syntax
protx register_prepare collateralHash collateralIndex ipAndPort ownerKeyAddr operatorPubKey votingKeyAddr operatorReward payoutAddress feeSourceAddress
Open a text editor such as notepad to prepare this command. Replace each argument to the command as follows:
collateralHash: The txid of the 10,000 PIRATE collateral funding transaction
collateralIndex: The output index of the 10,000 PIRATE funding transaction
ipAndPort: Masternode IP address and port, in the format x.x.x.x:63636
ownerKeyAddr: The new PirateCash address generated above for the owner/voting address
operatorPubKey: The BLS public key generated above (or provided by your hosting service)
votingKeyAddr: The new PirateCash address generated above, or the address of a delegate, used for proposal voting
operatorReward: The percentage of the block reward allocated to the operator as payment
payoutAddress: A new or existing PirateCash address to receive the owner’s masternode rewards
feeSourceAddress: Address used to fund ProTx fee. payoutAddress will be used if not specified.protx register_prepare COLLATERAL_TX_HASH COLLATERAL_OUTPUT_INDEX SERVER_IP:63636 OWNER_ADDRESS OPERATOR_PUBLIC_KEY VOTING_ADDRESS 0 PAYOUT_ADDRESS FEE_SOURCE_ADDRESS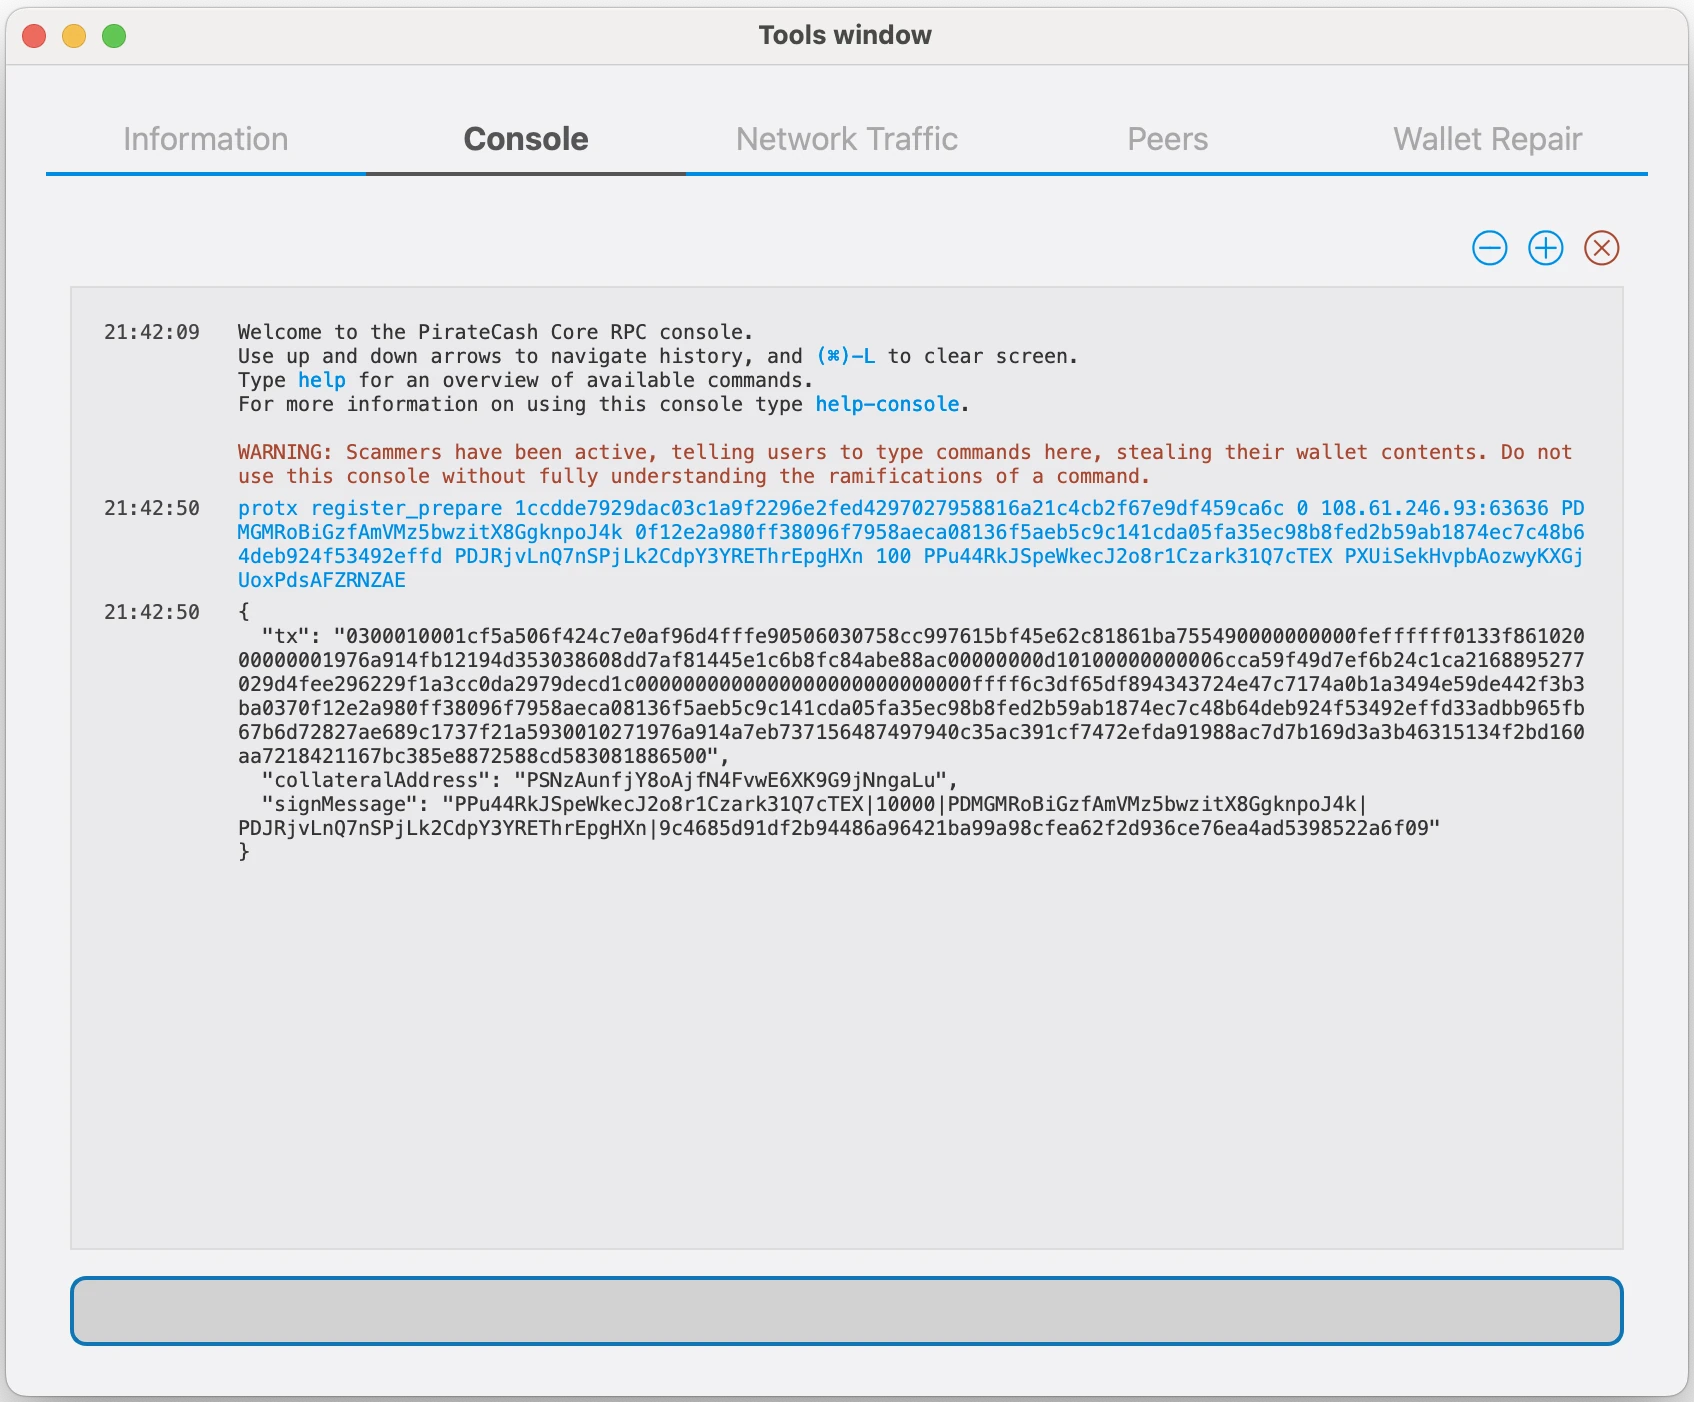
-
Sign the ProRegTx transaction
We will now sign the content of the signMessage field using the private key for the collateral address as specified in collateralAddress. Note that no internet connection is required for this step, meaning that the wallet can remain disconnected from the internet in cold storage to sign the message. In this example we will again use PirateCash Core, but it is equally possible to use the signing function of a hardware wallet. The command takes the following syntax:
signmessage collateralAddress signMessagesignmessage COLLATERAL_ADDRESS SIGN_MESSAGE
-
Submit the signed message
We will now submit the ProRegTx special transaction to the blockchain to register the masternode. This command must be sent from a PirateCash Core wallet holding a balance on either the feeSourceAddress or payoutAddress, since a standard transaction fee is involved. The command takes the following syntax:
protx register_submit tx sig
tx: The serialized transaction previously returned in the tx output field from the protx register_prepare command
sig: The message signed with the collateral key from the signmessage commandprotx register_submit PREPARED_TX SIGNATURE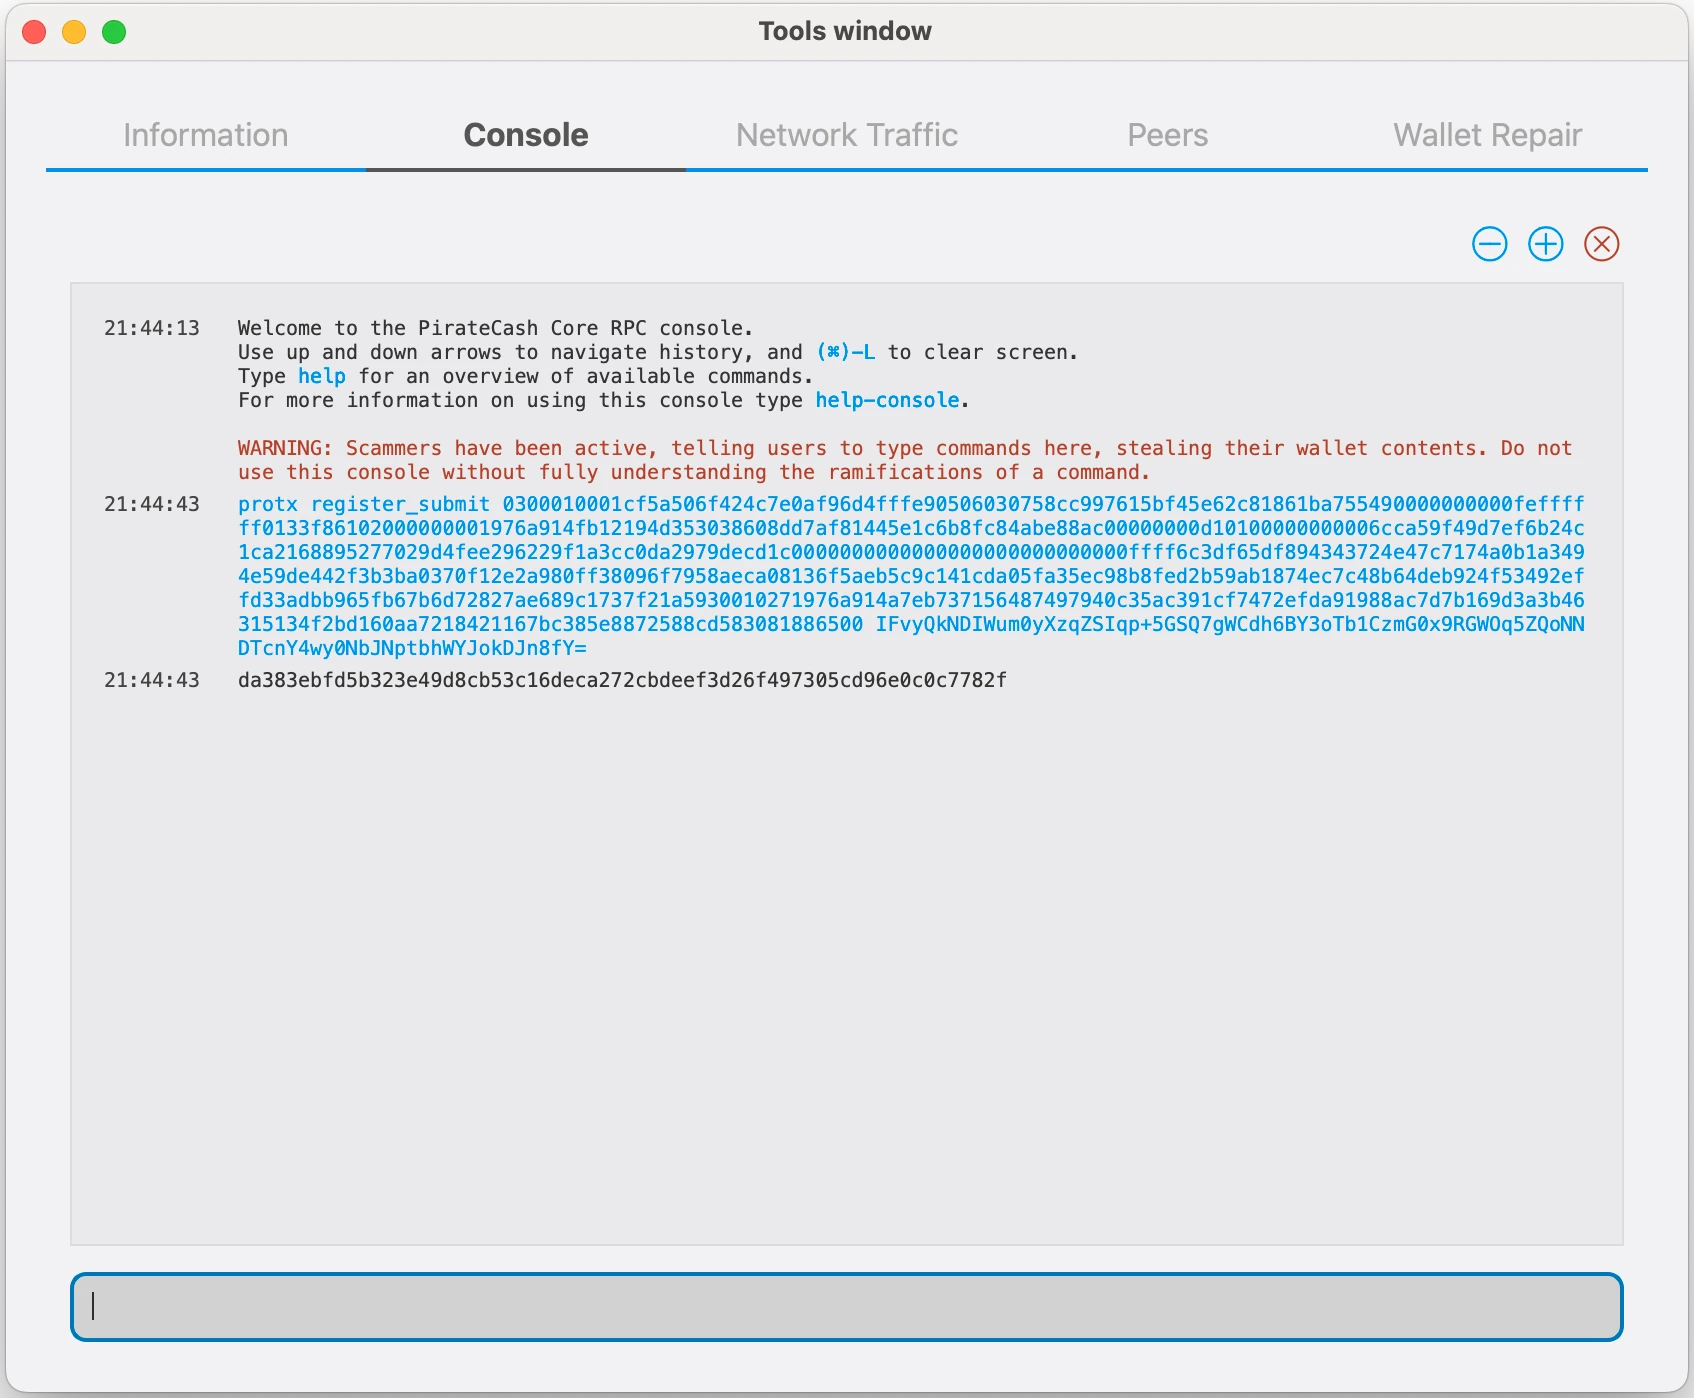
-
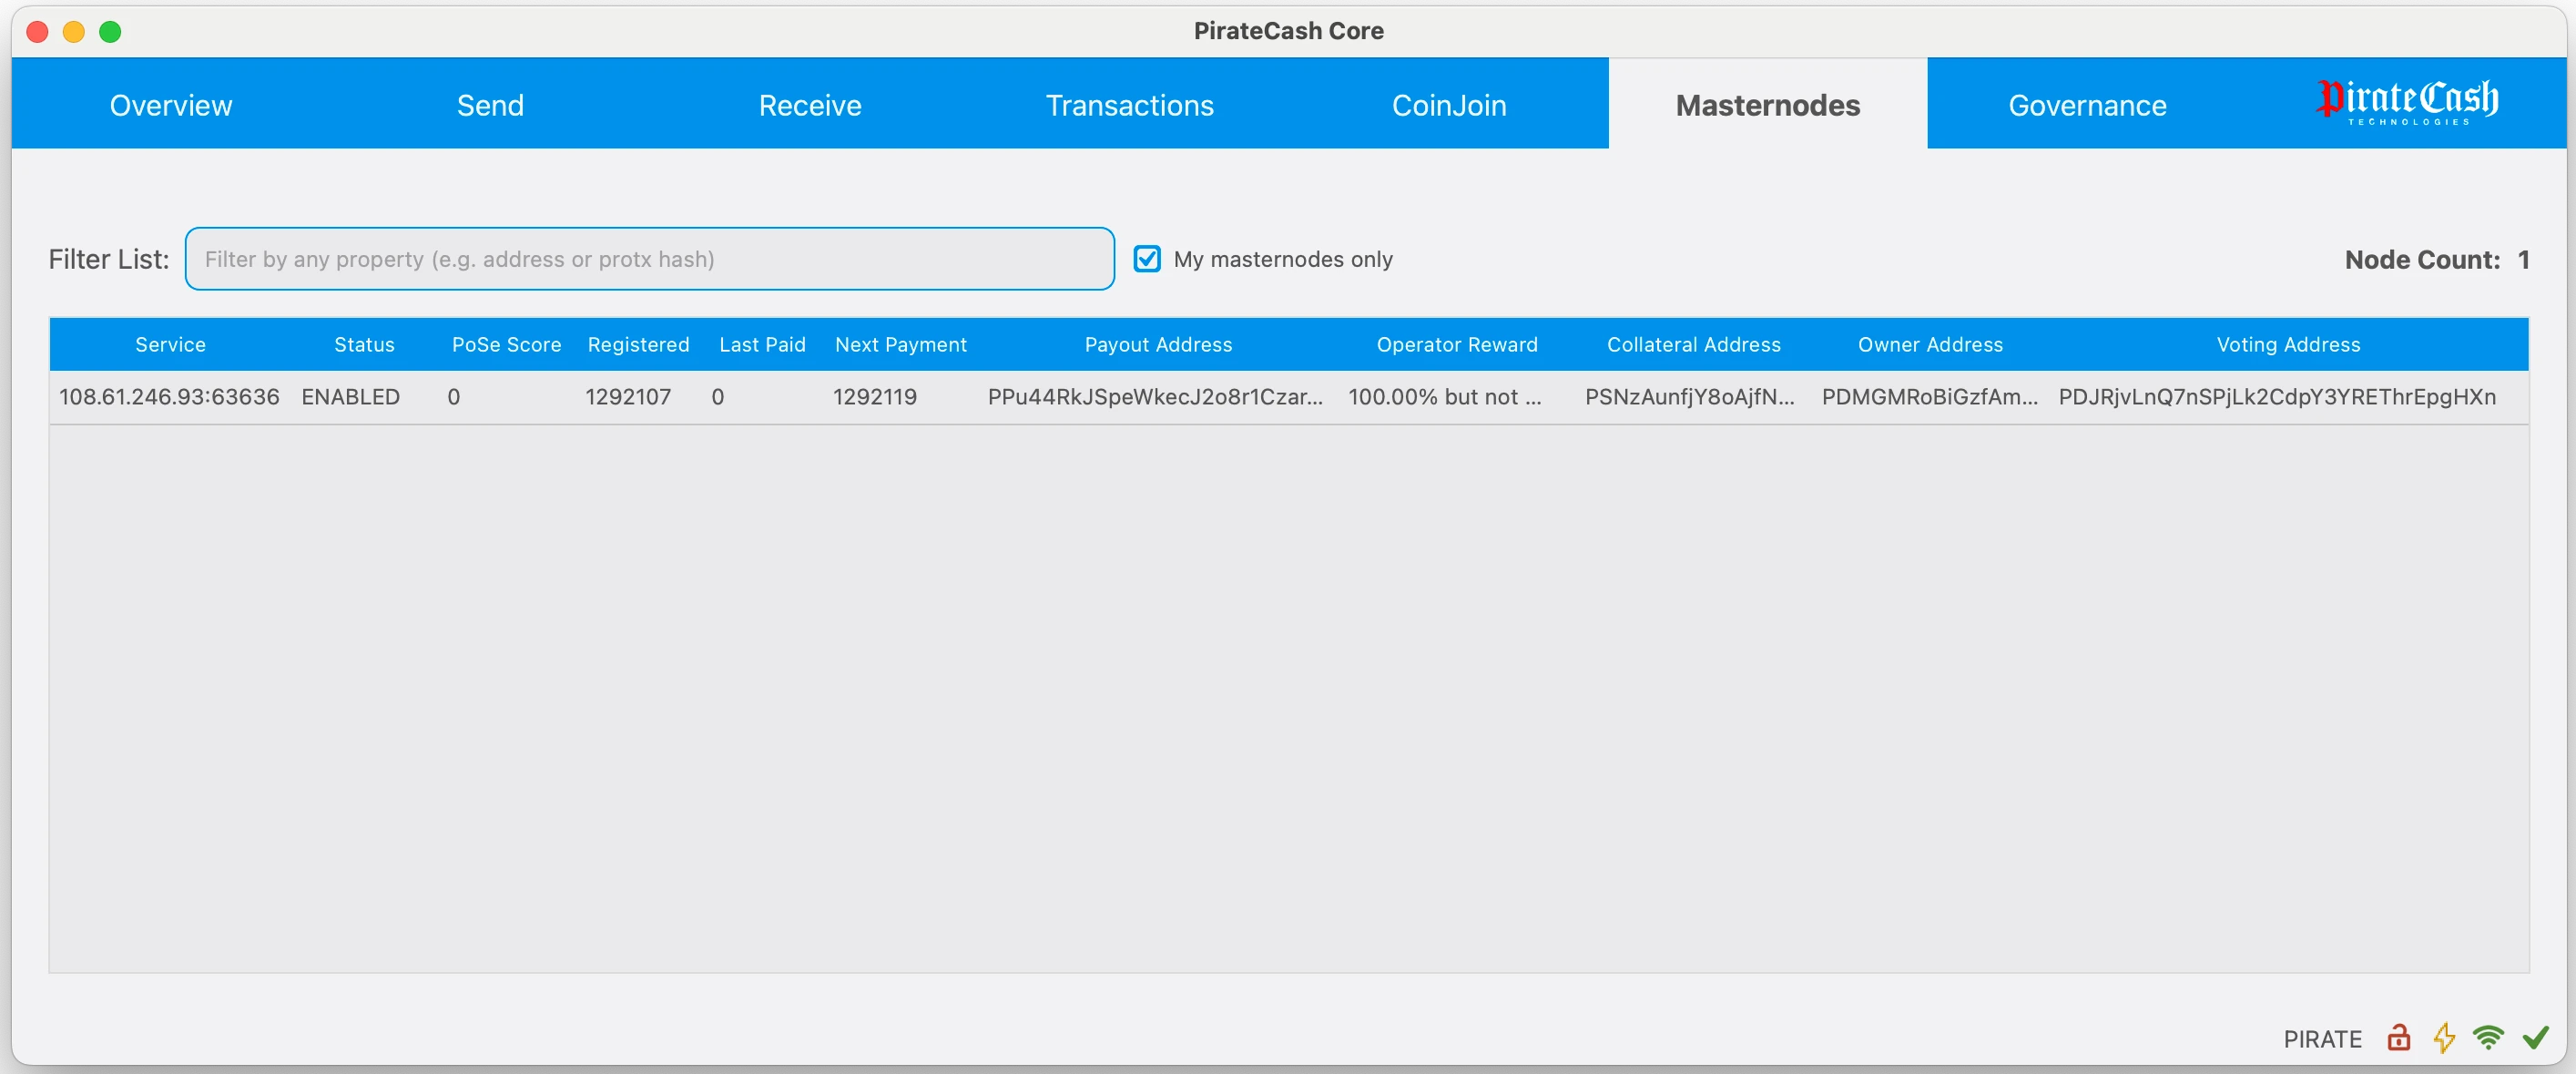
Your masternode is now registered and will appear on the Deterministic Masternode List after the transaction is mined to a block.
Aktualisierung einer bestehenden automatischen Masternode
Dieser Abschnitt gilt, wenn Sie die Node zuvor aus dem masternode-Repository installiert haben. Die Datei piratecash-main/piratecash.conf im Repository ist nur eine Vorlage; die aktive Node-Konfiguration liegt in /opt/node/piratecash/piratecash.conf.
- Verbinden Sie sich per SSH mit dem Server und wechseln Sie in das Repository-Verzeichnis, normalerweise ~/masternode.
- Führen Sie git pull aus. Wenn Git meldet, dass lokale Änderungen in piratecash-main/piratecash.conf überschrieben würden, prüfen Sie, ob wichtige Werte nur in dieser Vorlagendatei gespeichert sind.
- Wenn die Werte bereits in /opt/node/piratecash/piratecash.conf stehen, verwerfen Sie die lokale Vorlagenänderung mit git checkout -- piratecash-main/piratecash.conf.
- Führen Sie erneut git pull aus, um die neuen Dateien herunterzuladen, einschließlich update_masternode.sh.
- Führen Sie ./update_masternode.sh aus. Das Skript aktualisiert die Docker-Konfiguration, behält oder erstellt Corsa-RPC-Zugangsdaten, schreibt sie in .env und /opt/node/piratecash/piratecash.conf und baut sowie startet anschließend die Container neu.
cd ~/masternode
git status
git checkout -- piratecash-main/piratecash.conf
git pull
./update_masternode.sh
Prüfen Sie nach Abschluss des Skripts, dass die Container laufen:
docker compose psWenn Sie absichtlich nur die Vorlagendatei im Repository geändert haben, kopieren Sie diese Werte vor git checkout -- und tragen Sie sie nach dem Update in /opt/node/piratecash/piratecash.conf ein.